My son, Patrick, has observed on more than one occasion that I do not like 3D printing. That may sound odd, because I built a printer back in 2012 and since then I’ve built a lot of printers and I currently have at least three in my lab. But Patrick correctly realized that I don’t actually enjoy printing things that I need. What I do enjoy is building, fixing and even more importantly improving the printers themselves. If you are reading Hackaday, you probably know how that is. This is the story of an upgrade gone bad, although the ending is happy enough. If you’ve ever thought about moving from a traditional hot end to an all-metal hot end, you might want to hear me out and maybe I can save you some trouble.
A few years ago, I picked up an Anet A8 for a really low price. As printers go, it is adequate. Not bad, but not amazing. But it is a fun printer because you really need to do some work on it to brace the acrylic frame and fix other shortcomings. I merrily improved the printer quite a bit over a relatively short period of time and I also bought a bunch of aluminum extrusion to rebuild the frame to the AM8 plans you can find on Thingiverse.
An AM8 is Born

But life happens, and that box of extrusions sat on the shelf for a few years. Looking for a pandemic project, I decided it was time to take the plunge and the results were great. Having a solid metal frame on the printer really turned it into a world-class printer. Except for one thing.
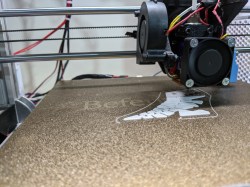
The extruder on the A8 — actually, the entire X assembly — doesn’t really change on the AM8 build. I had made some very simple changes to the extruder, but it was mostly stock and that was a pain. The extruder is a NEMA17 stepper in a U-shaped metal frame with a conventional extruder bolted to it. A fan totally covers the extruder and the heat break screws right into the bottom, followed by the heat block and the nozzle.
I’d already moved the fan for access, something most people with A8s do. However, the thing was a pain to load and with the cooling not so great on the heat break, jams were reasonably common, if not as common as you might expect. Clearing jams was quite painful though.
New Extruder
I knew for a long time I wanted to put something better in place and I had a few knock-off E3D V6 hot ends sitting around. Like the extrusions, they’ve been in storage for a few years. I printed a mount and got that working great. Once that worked, I redesigned the mount, put on a clone Titan extruder, and fed it with a Bowden tube.
It was great! Easy to load, rarely jammed and any clogs were simple to fix. Time to call it a day, right? Of course, not. I had to make just one more change.
All Metal
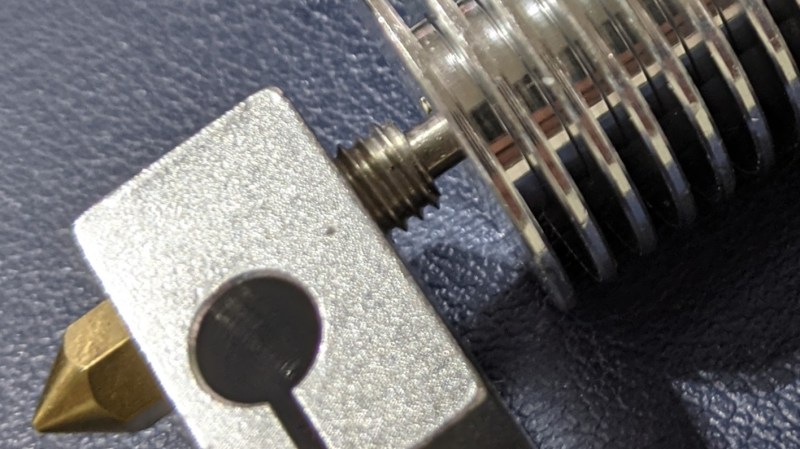
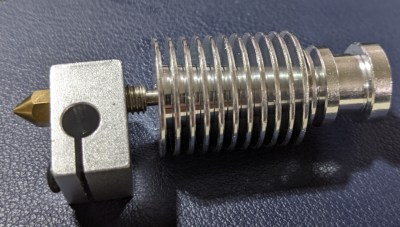
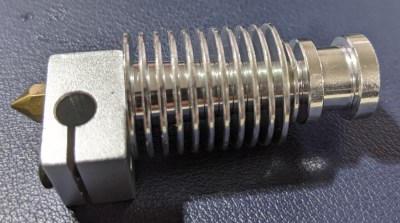
If you haven’t taken a hot end apart before, the general flow is that plastic enters into a heat sink. Then it travels through a little tube called a heat break or a throat. This tube tries to isolate the hot part of the hot end from the filament that is heading towards the nozzle. The far end of the heat break butts up against the nozzle inside the heat block which is a metal block that holds the heating element and the thermistor. Ideally, the filament melts just before it leaves the heat break and enters the nozzle.


The normal heat break has PTFE inside which keeps the filament on track even if it gets a little soft. However, at temperatures above 250C, the PTFE tube can break down, so they also make heat breaks out of only metal. A normal metal heat break will be very thin stainless steel, but you can also get some made of titanium or even some that use two different metals. The video below shows a nice assembly guide for two common types of hotends.
So, obviously, an all-metal hotend would be better, right? Maybe not. It depends on what you are trying to do. While an all-metal hotend will let you crank up the temperature, they have their own problems. First, some plastics really want to stick to the metal. This is especially problematic for doing retractions. Second, if heat creeps up the heat break, it can melt early and this can cause jamming and underextrusion, as well.
If you don’t need temperatures above 250C, you might consider not changing to all-metal. But of course, I wanted that temperature range and I did it. That led to a mystery and, like many mystery stories, the culprit will turn out to be a minor player briefly glimpsed.
At First…
At first, I put a generic stainless steel heat break in with the new nozzle. It came with a little envelope of heat compound and I used it on the cool-end of the heat break. The printer would jam almost at once. Keep in mind that with the old nozzle and heat break, all was fine.
A heat break is supposed to have as little thermal conductivity as possible, so that the filament doesn’t melt until it gets down into the heat block. Usually, the tube is very thin since this conducts less heat. For some reason, the new heat break without the PTFE in it was jamming badly.
The jams seemed to occur on retraction. Turning off retraction worked, but left me with very stringy prints. I tried reducing retraction, but no matter how low I went, the hot end would jam. When I would pull the filament back out, it would have a mushroom-like head blocking it from reentering the heat break.
Everything on a 3D printer seems to be interrelated. So I took the 30 mm cooling fan off — it was a cheap clone after all — and replaced it with a 40 mm fan that should have had more flow. I used a printed adapter to put it together. It didn’t seem to help.
I also ordered a titanium heat break. Titanium has even worse thermal conductivity so, in theory, it should keep the cold part of the hot end even colder. That didn’t seem to work very well either and I was running low on the thermal paste.
Solutions
Since I had so little of the thermal paste, I thought about using some CPU compound. However, looking up what I had, the maximum temperature was a bit low. However, upon reflection, I realized that the cold-side of the heat break shouldn’t be as hot as the nozzle anyway, so it should be workable.
The idea of only putting compound on the upper threads is that you deliberately want to stop heat transfer from the hot block to the heat break. But whatever heat does go into the break, you want to convey to the heat sink with maximum dispatch.
The new thermal paste — something called Ice Mountain #1 — did the trick. I don’t know if the generic white paste was old or just of poor quality. The Ice Mountain is some carbon/silicone compound and seems to work great. No more jams or heat creep.
Butterfly Effect
This is a great example of how almost every setting and component in 3D printing is interrelated. The new hot end required adjustment of the bed height, the flow temperature, and retraction settings. It also required adequate heat transfer between the hot end components.
Was it worth it in the end? Just for PLA, probably not. However, now I’m ready to experiment with different filaments and the PLA prints seem to be doing fine.
What’s next? Maybe multiextrusion? If you really want to test your hotend knowledge, try resurrecting a mistreated machine.

0 Commentaires