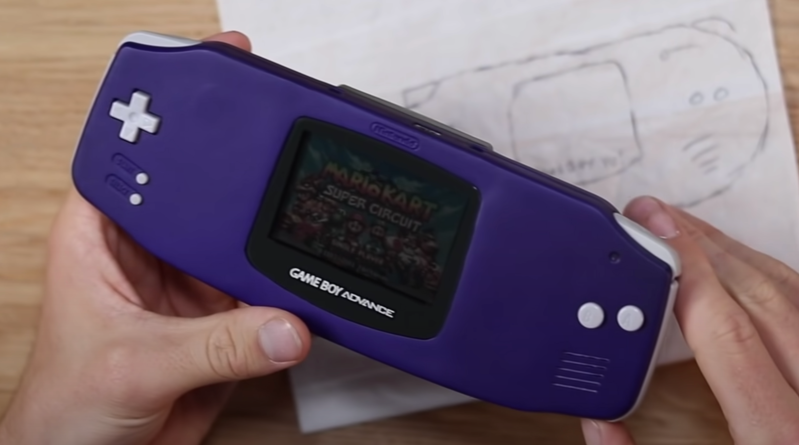
Here at Hackaday, we see all sorts of projects, some born out of a deep necessity or itch that couldn’t be scratched. Others are born out of a world of “why not” and it is perhaps these projects that put the biggest smile on our faces. The WideBoy Advance by [Elliot] of Retro Future is one such project.
Starting with a working Game Boy Advance and a donor one with a busted motherboard, the frankenstein-ification could start. A Dremel split one case in half and removed the sides on another, while trusty old car body filler helps fill and smooth the gaps. A particularly clever trick is to use the Dremel to create channels for the filler to adhere easier. Several areas had to be built up with filler and glued in bits of plastic as a base. As you can see in the video below, the countless hours of sanding, priming, sanding, and more priming led to a beautifully smooth finish. The choice of purple paint really sells the impression of a factory-fresh Game Boy Advance.
The working circuit board was desoldered and the donor board was cut into pieces to fit in the extended sides. Using some magnet wire, connections were bridged over to the original motherboard via the test points on the PCB. [Elliot] didn’t opt to swap the screen to an IPS display or add a backlight. These quality of life improvements are nice, but a dead giveaway that Nintendo didn’t make it. The goal is to get the user to wonder, even if just for a second, what if Nintendo just happened to make this wide one-off handheld console.
[Elliot] made it simply because he found it interesting and enjoyed the form of the thing he made. Is it a hack? Is it art? Probably a little bit of both. This isn’t his first modified Nintendo handheld either. He previously made a long Nintendo Gameboy DMG-01. We love seeing all the wild hacks and tweaks made to Game Boy line, such as this Game Boy Color inside the DMG-01.
0 Commentaires