
For big-ticket purchases, I tend to do a lot of research before I open my wallet. I like to at least have the illusion that when I send my money off to a far-away stranger, I’m likely to get back something of equal value in a reasonable timeframe that does what I want it to do. So I tend more toward the “analysis paralysis” end of the spectrum, where I pore over so many specs and reviews that I end up buying nothing.
While that sounds like a bad thing, and sometimes is, I find that it tends to help me avoid rashly spending money on things that aren’t going to work for me. This is especially true in the area of tools, where while I’m trapped in my analysis loop, I often find a workaround or substitute that’s good enough to get the job done.
For some things, though, there is no substitute, and when you start working with SMD components that you’d have a hard time telling from a grain of salt, you’re probably going to need a microscope. I recently determined that this was where I was in my electronics journey, and now that I’ve worked my way through the analysis and procurement phase of the process, I thought I’d share my first impressions of my microscope, and what it’s like to get used to working with one.
Setting Expectations
Luckily, I was pretty sure about a couple of things I wanted in a microscope. I knew that I wanted an optical microscope, as opposed to a digital camera and monitor setup. While there are plenty of people who do excellent work with these setups, I felt like an optical scope would be the best match for me. I really didn’t like the idea of dealing with the lag a USB microscope always seems to exhibit, and even if it’s a direct HDMI camera to monitor setup, I felt that staring at a monitor on the wall while working on a circuit on the bench would be disorienting. It seemed like a better idea to have my eyes pointed at least in the general direction of where my hands were working.
On the other hand, there’s a lot to be said for being able to put things up on a big screen, especially for someone in my position, who is likely to want to write about what he’s doing and include some pictures and videos. So I was reasonably sure that I’d want a scope that’s capable of having a camera attached. I figured this was more of a “nice to have” than a feature I’d need out of the gate, but I at least wanted the option to add a camera in the future.
I was also reasonably sure that I’d need something compact enough that it wouldn’t claim a lot of my limited bench space. Being able to push the scope out of the way to make way for non-SMD work seemed like a good idea. There were also budgetary limits — I really didn’t want to spend more than $500.
With my specs in hand, I set about doing my research. Unfortunately, I didn’t have much to go on other than online reviews, and far too often those are worth less than the paper they’re written on. Luckily, the Hackaday community is pretty helpful with these kinds of purchases, and a lot of the leg work had already been done by others. I found a lot of reviews of scopes, but one stood out: Scotty Allen’s “A Boy and His Microscope” video.
I think what really resonated with me about Scotty’s video is his confession that, at least with soldering, “My expectations of myself far exceeded my abilities.” That’s a truth bomb that hit me pretty hard, and seeing that he had managed to work around his physical limitations by buying a microscope was encouraging. He had also set up a deal with the Shenzhen market vendor where he bought his scope, which eliminates a lot of the guesswork involved in trying to purchase bits and pieces from various vendors. So, since Scotty’s package deal seemed to fit my needs, I placed an Ali Express order in late December.
And just to be clear, this was entirely at my personal expense. I was just following Scotty’s advice but spending my own money, so there’s no sponsorship of any kind here. My impressions and opinions are entirely my own.
First Impressions
Ordering from China always seems like a bit of a crapshoot these days, but to my delight, the scope arrived in only about two weeks. The package was in fine shape, but I was surprised by the compact size of the box — it just seemed too small for a bulky scope. But that ended up being due to very clever packaging, with the entire scope stripped down and the parts wrapped separately before being tucked into the foam packing. I didn’t see any damage from shipping.
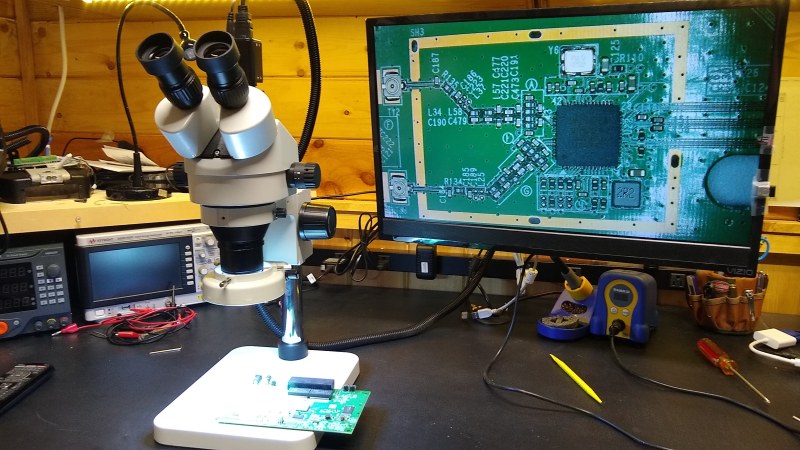
The scope package I bought includes the binocular stereo zoom microscope body, a pair of eyepieces with cups, and a stand. Accessories include a ring light, a 0.5 x Barlow lens, a protective filter, and the all-important HDMI camera with adapter ring. Although there was no manual, assembly was a breeze — everything pretty much only fits where it’s supposed to go. You’ll need some tools, like a very small Phillips screwdriver, but it’s all pretty straightforward and self-explanatory. The only trouble I had was tidying up the cables from the camera and the ring light, which were flopping all around the place. I decided to make a single “umbilical” to the monitor on my bench by bundling the cables and wrapping them with some plastic wire loom.
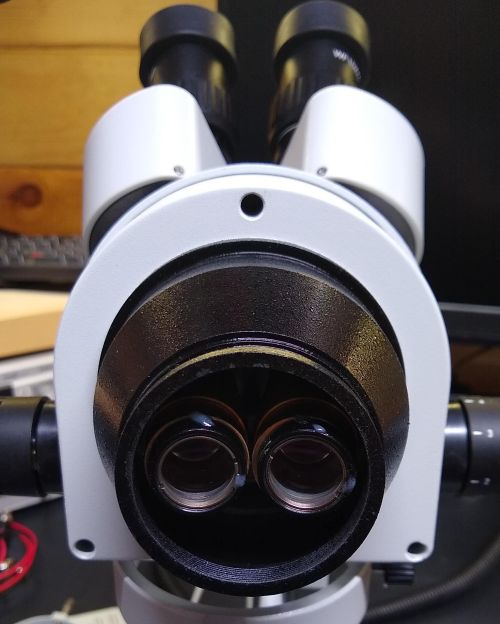
My first impressions on quality were quite favorable. All the metal parts are nicely finished, and the castings have no flash marks or defects. Aluminum parts have a good-quality anodized finish, and the threads on all the optical components were clean and lightly greased. There wasn’t any stray grease on surfaces that shouldn’t have it, a common problem with cheap optics in my experience. Also absent was that familiar chemical odor that often seems to come with some shipments from China. The only part that had any real odor was the plastic dust cover, and that dissipated quickly once it aired out a bit.
I have to say that for an entry-level microscope, this one has some really good optics. I have yet to find anything that seems misaligned or out of whack, and the visual field is flat and bright. I chose to attach the Barlow lens, which screws onto the body just below the dual objective lenses. The 0.5 x lens shrinks the visual field slightly, letting you raise the microscope up on its stand quite a bit. This makes more room for tools and hands between the stage and the objective — I measure about 14 cm.
On the other end, the binocular eyepieces are fully adjustable. The eyepieces swivel to adjust for interocular distance, and each eyepiece can be adjusted to different focal lengths. This makes it easy to set up the scope just the way you like it, which is often a problem I have with optics — it’s hard for me to get the “eye relief”, or the distance between the eye and the lens, just right to get a full field of view. On this scope, it’s pretty easy to adjust for proper eye relief, even when I choose to wear my reading glasses.
I do have one complaint about the eyepieces, though. The grub screws that retain the eyepieces in their tubes don’t actually touch the lens; rather, they only screw in far enough to engage in a groove in the lens body. This keeps the eyepiece from slipping out, but leaves it loose in the tube. It’s only really noticeable when the rubber eyecups touch my glasses, which makes the eyepieces wiggle around in their tubes. The resulting slight change in alignment of the optics makes it hard for my brain to meld the two images into a stereo view, which is really the whole point of a stereo microscope. A longer grub screw would probably solve the problem.
Practice Time
The whole reason I decided to get a microscope goes back to my failed attempt to repair an Xbox. In that article, I acknowledged how suboptimal my setup was, and what I intended to do before attempting the repair again. Aside from improving the lighting in my shop and getting a decent microscope, I figured what I really needed was some practice. So, having sorted the hardware issues, it was time to update my personal firmware with a little hands-on practice.
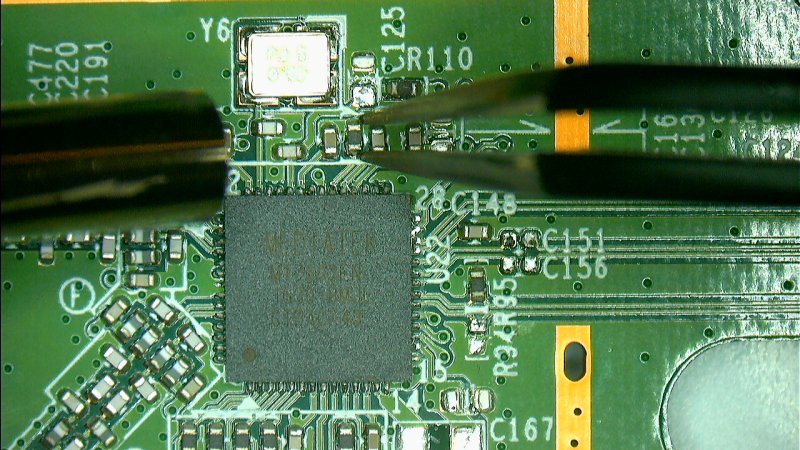
The junk bin offered up an old wireless router as a test subject, and I got busy trying to desolder random components. The first thing I noticed is that it takes a while to get used to the fact that the field you’re working in is so small. Looking through the scope with a zoom level of about 2x, the visual field is about 2.5 cm in diameter. Getting a soldering iron or tweezers into that field isn’t exactly easy, especially when you don’t have any peripheral vision to guide your hands. I find it worse to position tools with my left hand, which is my weak side. It’s getting better quickly, but it’s disconcerting.
The other thing I had a problem with was holding the PCB while I worked on it. The stage of the microscope isn’t huge, so my test subject PCB flopped around quite a bit. Plus, I found that applying the force needed to remove components would wiggle the board around, often throwing it out of focus. Some kind of helping hands to hold the board steady would be nice. Or, perhaps just a silicone mat on the stage to provide some friction — and some heat resistance — would be enough.
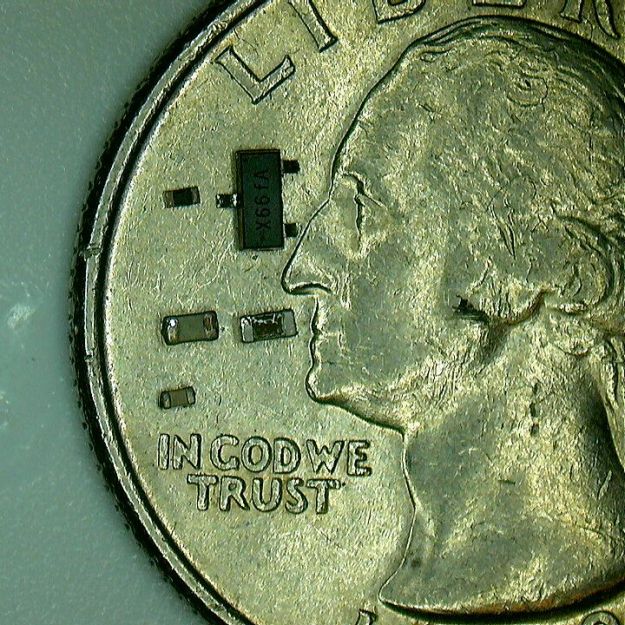
Ergonomic issues aside, I have to say I was pretty amazed after desoldering my first few components when I looked down at my little collection and realized how small they really are. Through the scope, I had no problem seeing them and handling them with the tweezers — although I did manage to yeet a few resistors off into the wild blue yonder when I had the air turned up too high on my rework station. But without the scope, there’s no way I would have been able to deal with these components.
Overall, I’m really pleased with this purchase. Apart from a few minor quibbles, like the fact that the plastic insert in the stage isn’t especially heat-resistant, it’s a really good value for the money. I need to make a few adjustments to my work holding, and I can always use more practice, but I think I’m getting closer to actually fixing that Xbox.
0 Commentaires