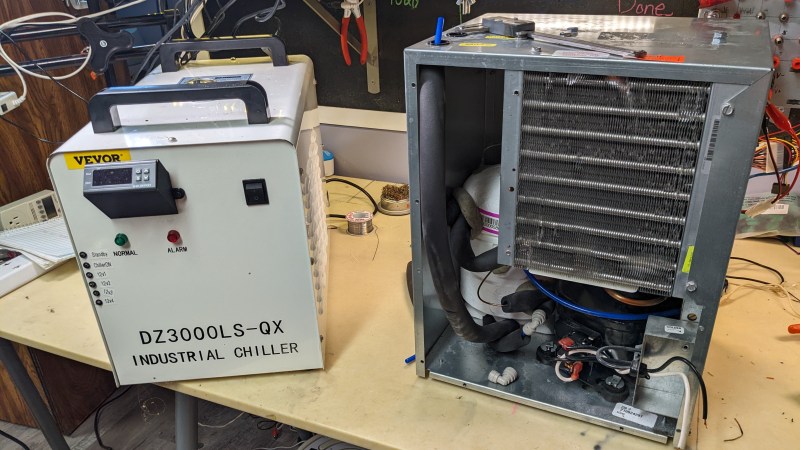
Getting a cheap CO2 laser cutter is great for your workshop needs, and while you might get a weaker-than-declared laser tube, it’s still going to cut whatever you need to be cut. That might not be the case for the cooling equipment you’re getting alongside it, however, as [RealTimeKodi] shows in a post-project blogpost. They bought a CX3000 “chiller” and found out it had no chiller components (Nitter), only equipped with a radiator, a fan, and a pump.
Having your laser tube water be somewhat close to ambient temperature is something you can already achieve with an aquarium pump and a bucket of water — and it isn’t worth paying $100 for. Left with the sunk cost and an unfulfilled need for a proper chiller, [RealTimeKodi] started looking for paths to take – first one was using TEC elements. The upgrade process was fun, but the result was subpar, as the elements gobbled power with hardly any useful output to show for it.
[RealTimeKodi] didn’t give up, and eventually found an old water fountain chiller with chiller-like components inside, sold for $200. They could’ve used the water fountain as-is, but a few design issues and thirst for adventure got in the way, indisputably forcing them to stuff the fountain’s guts into the CX3000’s case.
Buying a laser cutter can sometimes feel like buying a 3D printer a decade ago — you get a K40, learn to use it, add the missing safety features, mod in autofocus, upgrade the control board, expand the work surface… That said, our experience shows that you don’t need any of those if A4-sized 3 mm wood cutting suit you, but a proper chiller is still worth its weight in gold-plated acrylic.
I really need to finish this chiller.
all that's left is cutting some speed holes and minor finishing touches pic.twitter.com/TrYW5V7FDA—
Real-Time (@RealTimeKodi) October 25, 2022
0 Commentaires