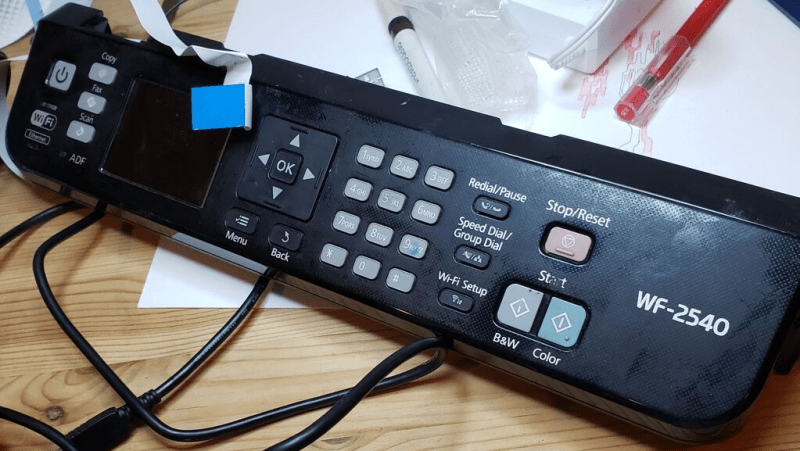
Many of us hardware-oriented types find it hard to walk past a lonely-looking discarded item of consumer electronics without thinking “If only I could lug that back to the car and take it home to play with” and [phooky] from NYC Resistor is no stranger to this sentiment. An old Epson WF-2540 inkjet printer was disassembled for its important ‘nutrients,’ you know, the good stuff like funky motors, encoders and switches. But what do you do with the control panel? After all, they’re usually very specific to the needs of the device they control, and don’t usually offer up much scope for reuse.

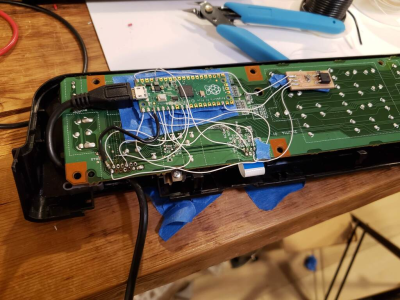
[phooky] doesn’t usually bother with them, but this time decided to have a crack at it for fun. Inside, nothing out of the ordinary, with a large single-sided PCB for the key switches and LEDs, and a small PCB hosting the LCD display. The easy part was to figure out how the keyboard scanning was done, which turned out to be pretty simple, it just uses some 74-series shift register devices to scan the columns and clock out the row lines. A Raspberry Pi Pico module was pressed into service to scan the keyboard and enable a keyboard map to be created, by pure brute-force. No need to trace the circuit. Things got interesting when [phooky] started looking into the LCD interface, based on the Epson E02A46EA chip (good luck finding a datasheet for that one!) and quickly realised that documentation simply wasn’t available, and it would be necessary to do things the hard way. Poking around the lines from the main CPU (an Epson E01A9CA , whatever that is) the display clock was identified, as well as some control signals, and three lines for the RGB channels. By throwing a Saleae data capture into some ROM exploring software, the display configuration was determined to be a standard 320×120 unit.
The PIO unit of the RP2040 was used to generate the video waveforms and push the pixels out to the LCD controller, allowing the RP2040 board to be wired inside the case permanently, converting the control panel into a USB device ready for action!
Want to know a little more about reverse engineering junk (or not) items and repurposing them to your will? Checkout this hacking piece from a couple of weeks back. For something a little more advanced, you could try your hand at a spot of car ECU hacking.
Thanks [Perry] for the tip!
0 Commentaires